You want to learn how to start a blog (and make money), but have no idea how to begin?
You’ve come to the right place. Here’s a step-by-step guide to help you start a blog within a few minutes.
How to Start a Blog in 5 Minutes
First, you’ll need your own domain name. (This is also called the “URL,” or web address.) You’ll also need “hosting” for your blog. Hosting is simply your blog’s home on the Internet.
Bluehost is widely regarded as one of the best hosts to use if you’re just starting out. It’s affordable and easy to use.
Plus, it only takes five steps to get your blog up and running – in five minutes.
Step 1: Register Your Domain
You first need to brainstorm what you want to call your blog. I ran through a bunch of possible names before I settled on “Afford Anything.”
Once you’ve thought of a name, head to Bluehost. Signing up through our affiliate link gives you access to the most affordable prices for hosting.
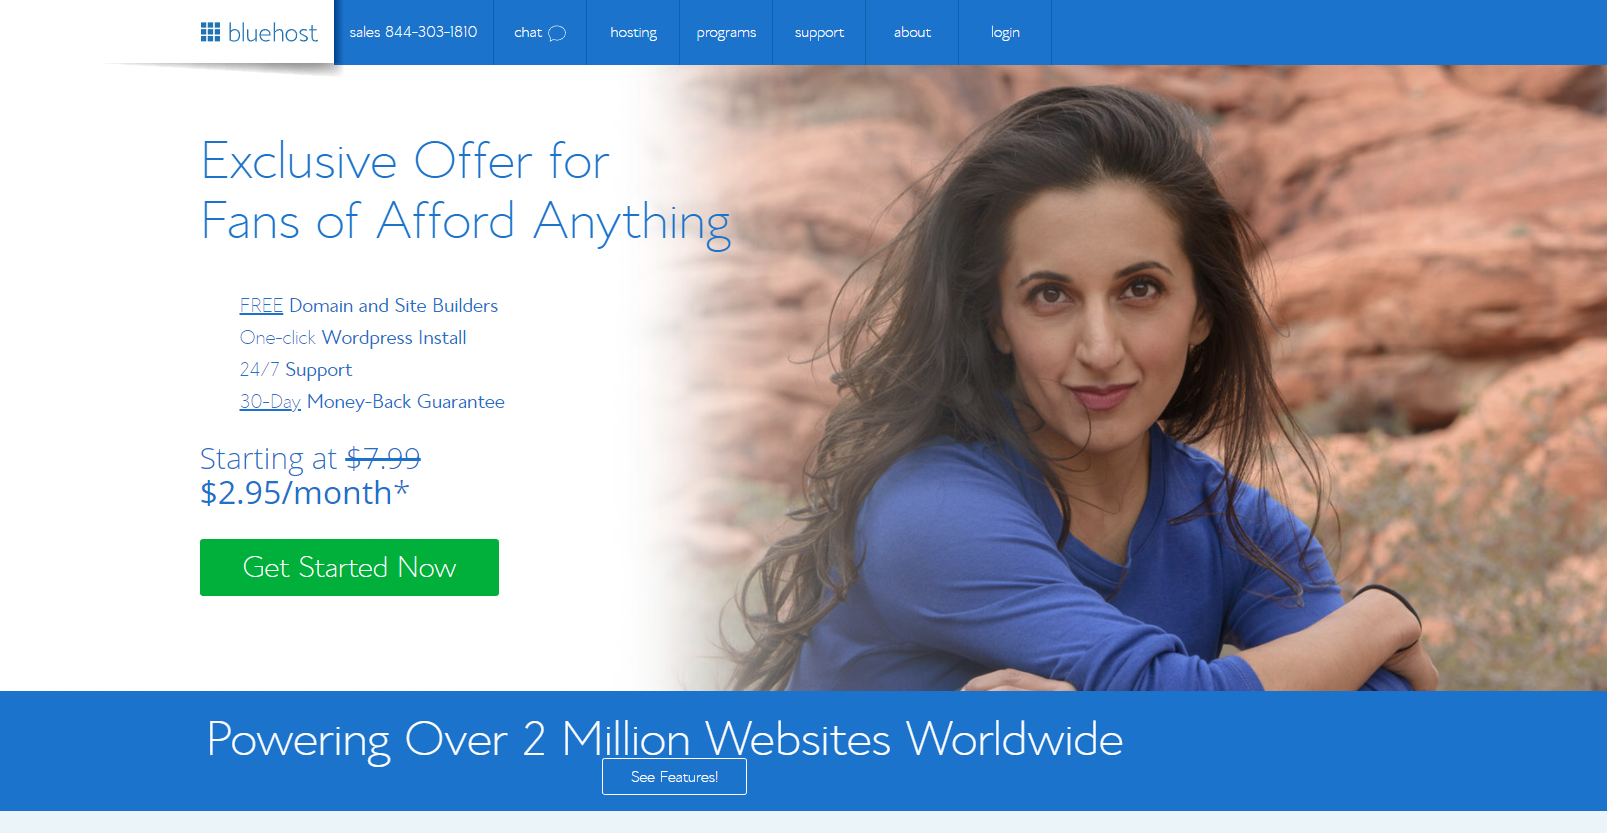
This leads you to this page:
Click the green “Get Started Now” button to, well, get started!
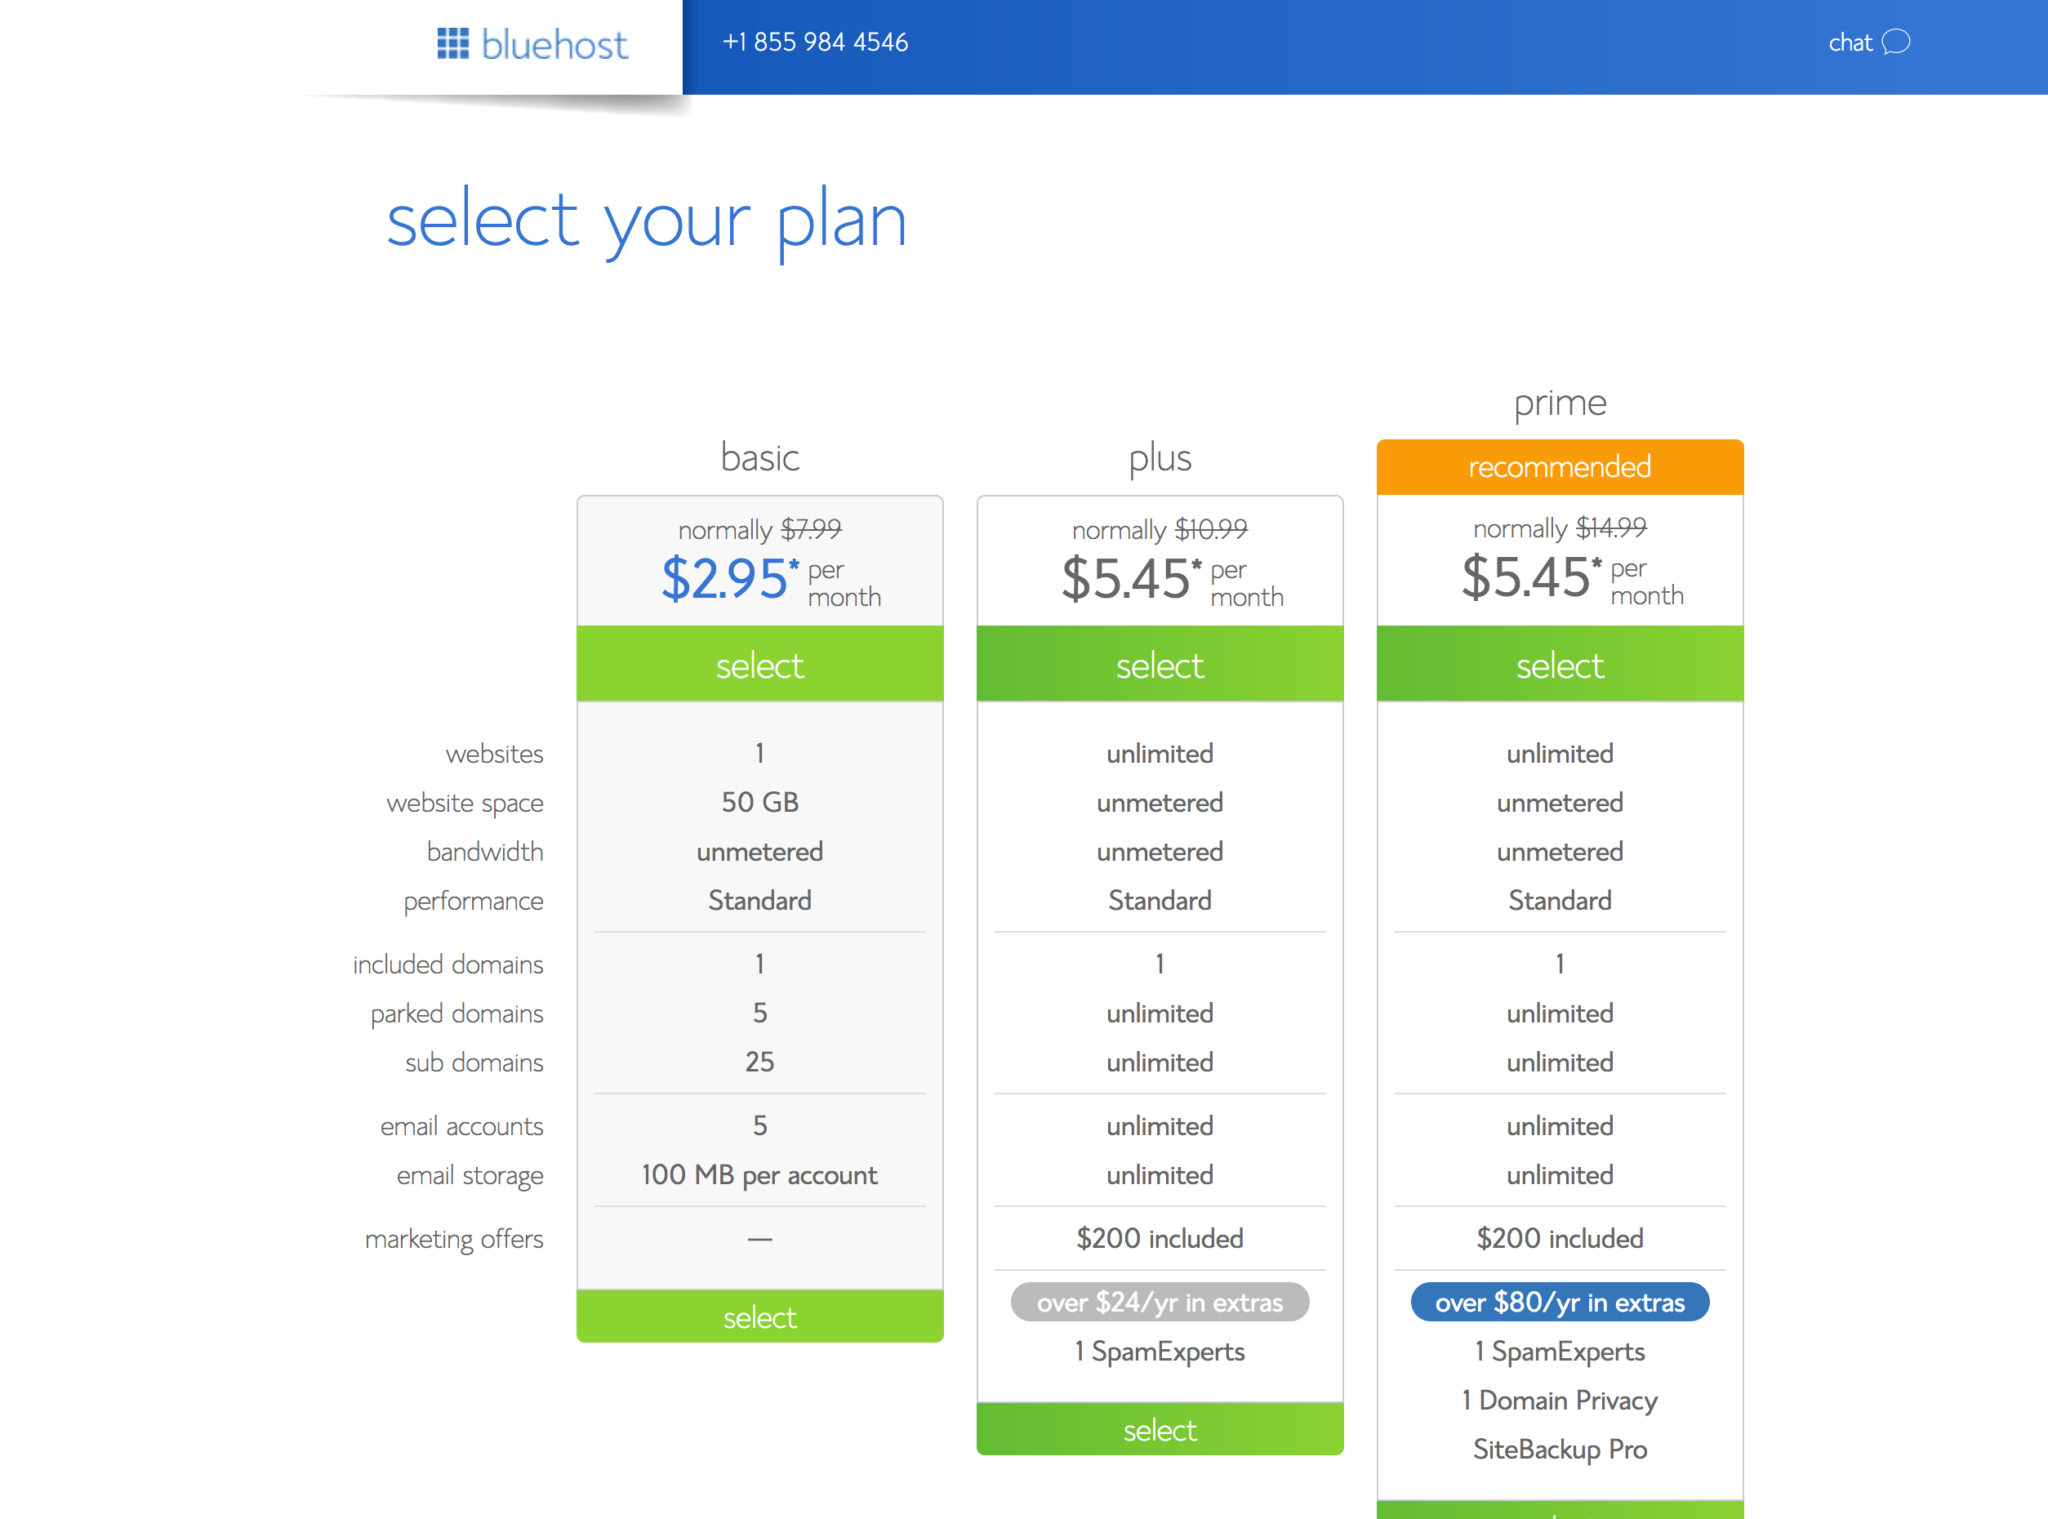
When you get to this page, you’ll be prompted to select your plan:
If you’re just starting out, the basic plan should be good enough. Hit the green “select” button and you’ll be taken to the sign up page.
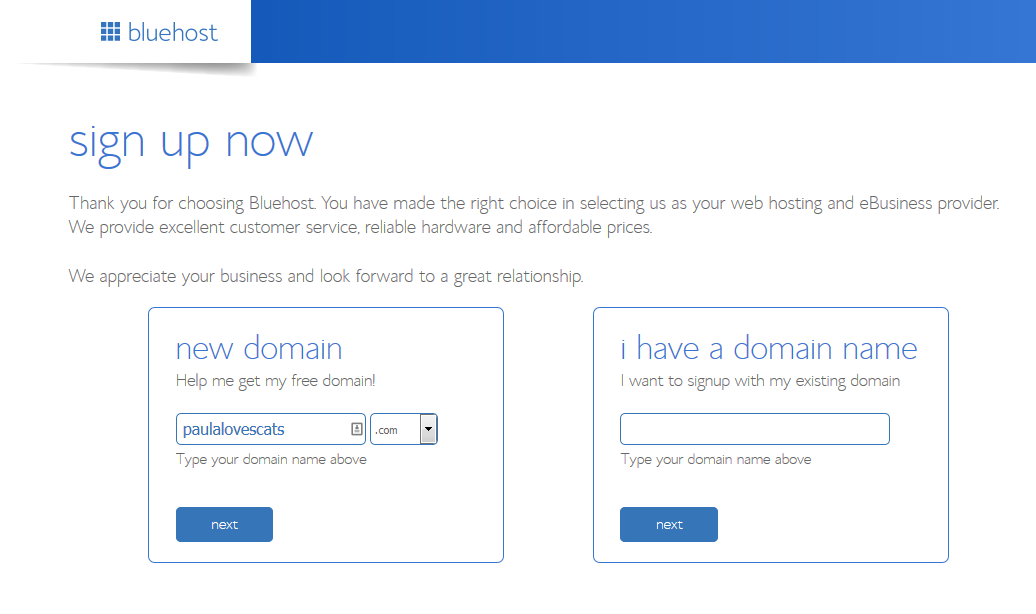
Assuming you’re just getting started, you probably don’t have a URL yet. If that’s the case, enter the URL you want in the “new domain” box, like this:
Click next. Hopefully, the domain you wanted wasn’t taken!
Step 2: Set up Your Hosting Account
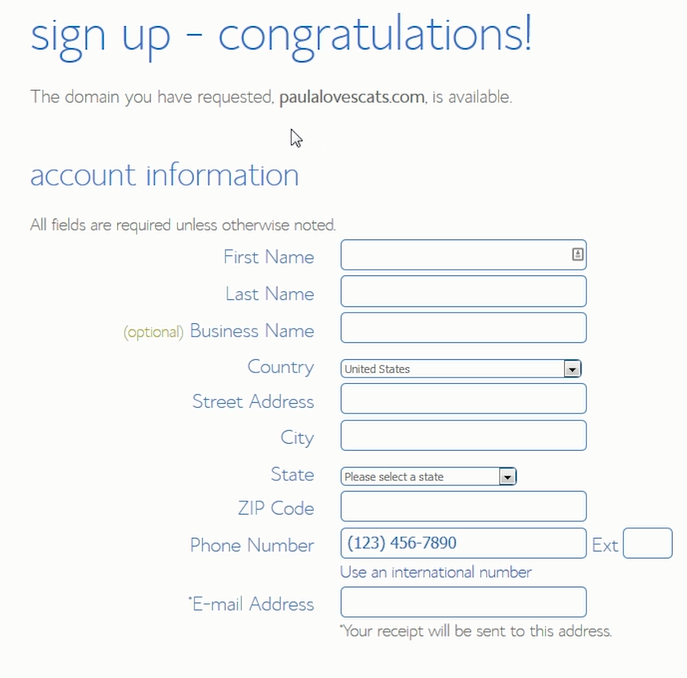
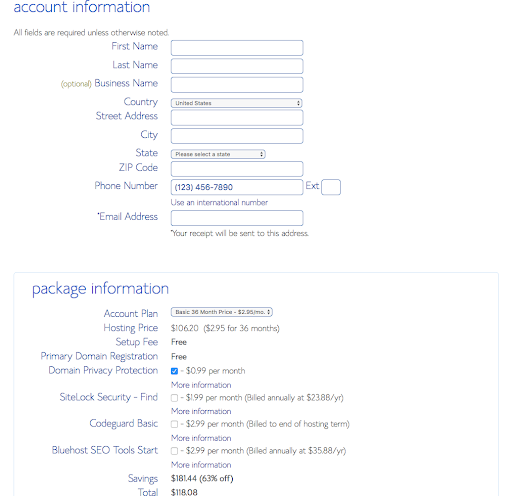
On this page, you’ll fill out your account and personal information:
After this, you’ll get to the “package information” section. The longer your hosting plan, the cheaper the package. Select whichever option you’re most comfortable with.
You’ll get a full refund if you cancel within 30 days.
Feel free to ignore the extras listed at this point (unclick those boxes). You can add them later, and there’s no need to worry about them now.
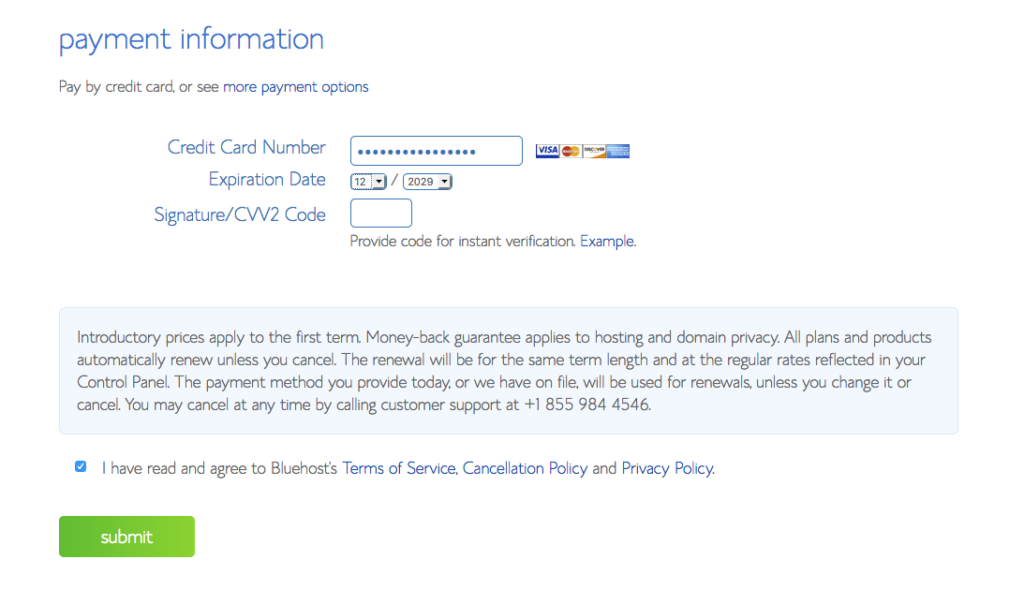
Next up, it’s time to pay. (Hey, at least blogging has low overhead, right?) Enter your credit card information here:
Check off that you agree to the terms of service, and click “submit.” You’ll get a congratulations, plus offers for various upsells:
Once again, feel free to ignore the extra services offered here. You don’t need these to start your blog!
Scroll to the bottom and click “No thanks.”
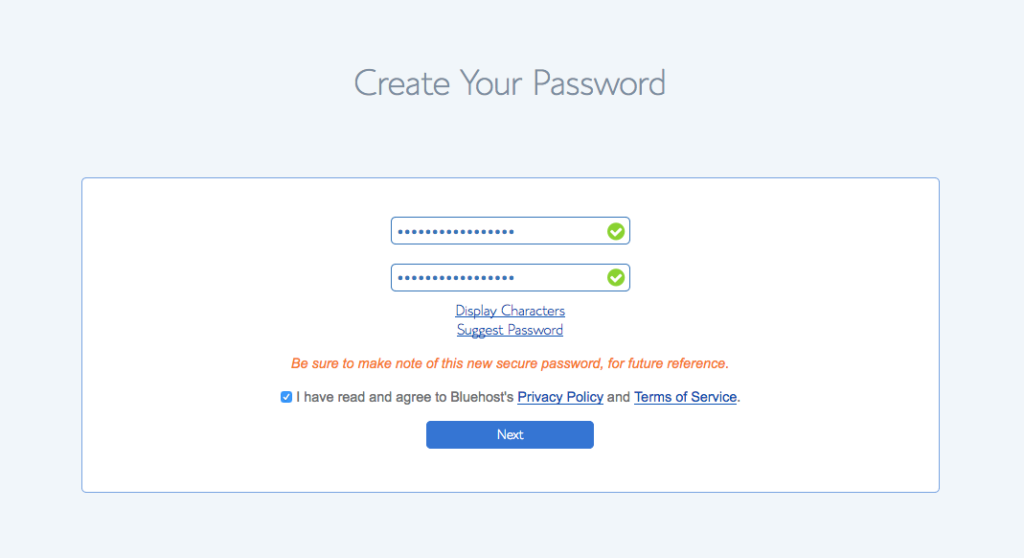
All right, now you’re registered, but you need a password. Click “create your password.”
Go crazy with this (and make sure you remember it) to prevent people from hacking your account.
If you can’t come up with something, you can take the easy way out and click “suggest password.”
Step 3: Install WordPress
Give yourself permission to feel a little giddy right now. You’re about to become a blogger! This is what you’ve always wanted, right? #lifegoals
Bluehost makes it extremely easy to start blogging as WordPress comes pre-installed with your site. Awesome, right? There’s literally nothing else for you to do here, so let’s move on.
Step 4: Set up WordPress
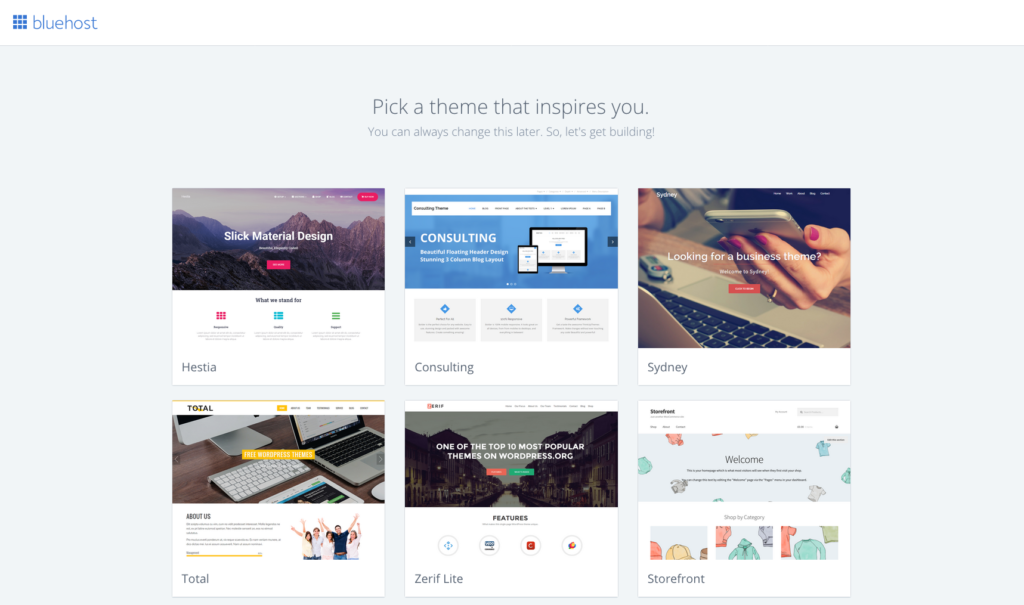
Okay, so WordPress is installed. It’s time to get a beautiful “theme” (that’s blogging-speak for ‘design’) for your blog.
A theme allows it to look nice and shiny. You may be okay with the default WordPress theme, but in order for your blog to stand out, you should personalize it a little.
The good news is that there are numerous themes available for free to get you started, and Bluehost gives you a preview of some of the popular ones.
Once you’ve selected a theme, you’ll see this message pop up:
Click on “start building” to set up your blog. Alternatively, you can check out your Bluehost account from here, but you can also do that later. Let’s get to the fun part – you’re almost done!
Step 5: Set up the Blog
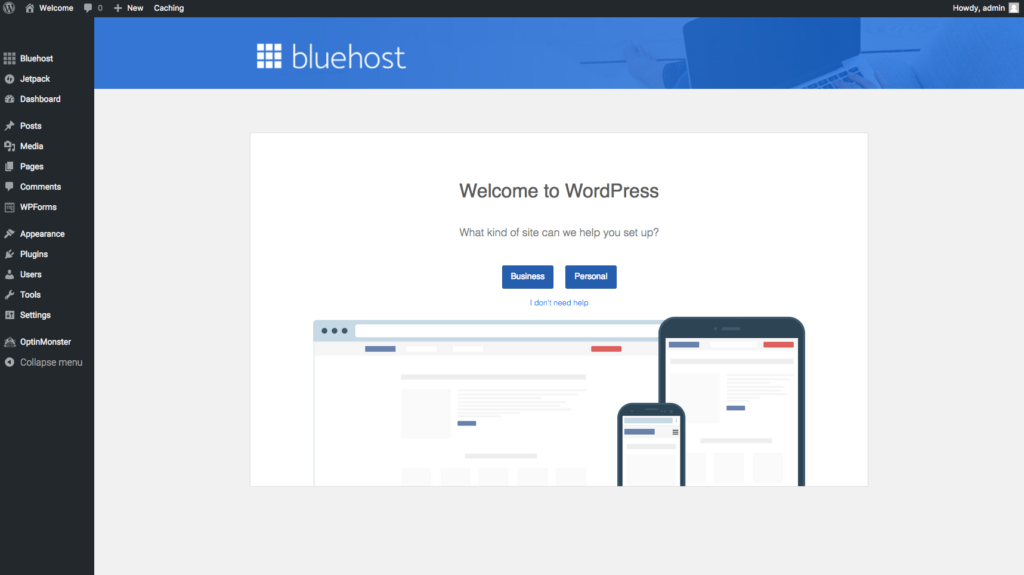
It’s time to put the finishing touches on your blog. You should be on this page now:
This is what’s known as the “back end” of your blog/WordPress. This is where you’ll make all the behind-the-scenes magic happen. 🙂
Click on either “business” or “personal” – whichever one applies to you.
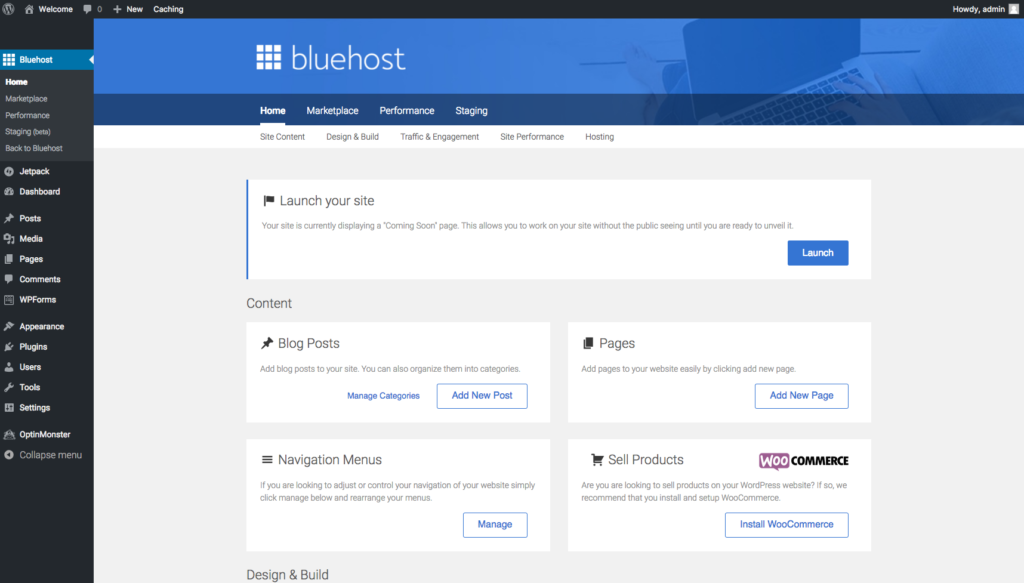
After that, you should see this menu of options. Bluehost is nice and lets you know that your site is currently displaying a “coming soon” page, so you can keep working on it in secret until it’s ready.
Once you’ve written and published a few posts and are happy with how it looks, you can click the “launch” button.
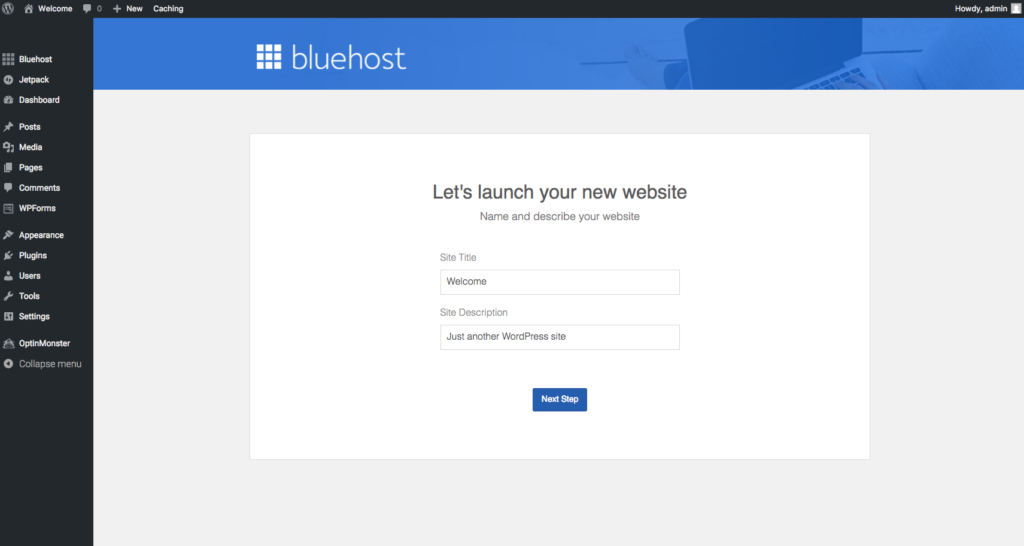
Doing so brings you to this:
You can always change your site title and description later, so don’t sweat it if you can’t come up with something amazingly witty right away.
To give you an example, the site title for Afford Anything is Afford Anything – You Can Afford Anything … Just Not Everything. What’s It Gonna Be?
With that, you’re all ready to give blogging a try! Good luck!
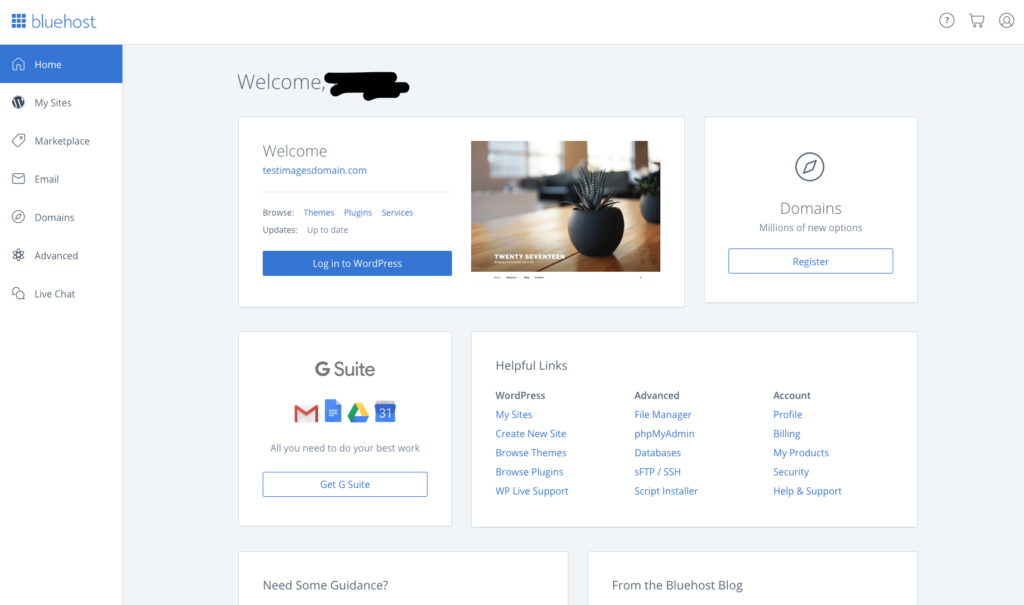
P.S. If you log into your Bluehost account, this is the page you should expect to see:
From here, you can receive customer service, log into WordPress, view the knowledge database, and more!
Step-by-Step Video Tutorial:
Were all those instructions a mouthful to take in?
No worries, we have a video walkthrough of how to set up a blog using Bluehost and WordPress, too!
Check it out (it’s only 5 minutes):
Thanks, and have an awesome time blogging!
